Dog Breed Classifier with CNN
Why We’re Here
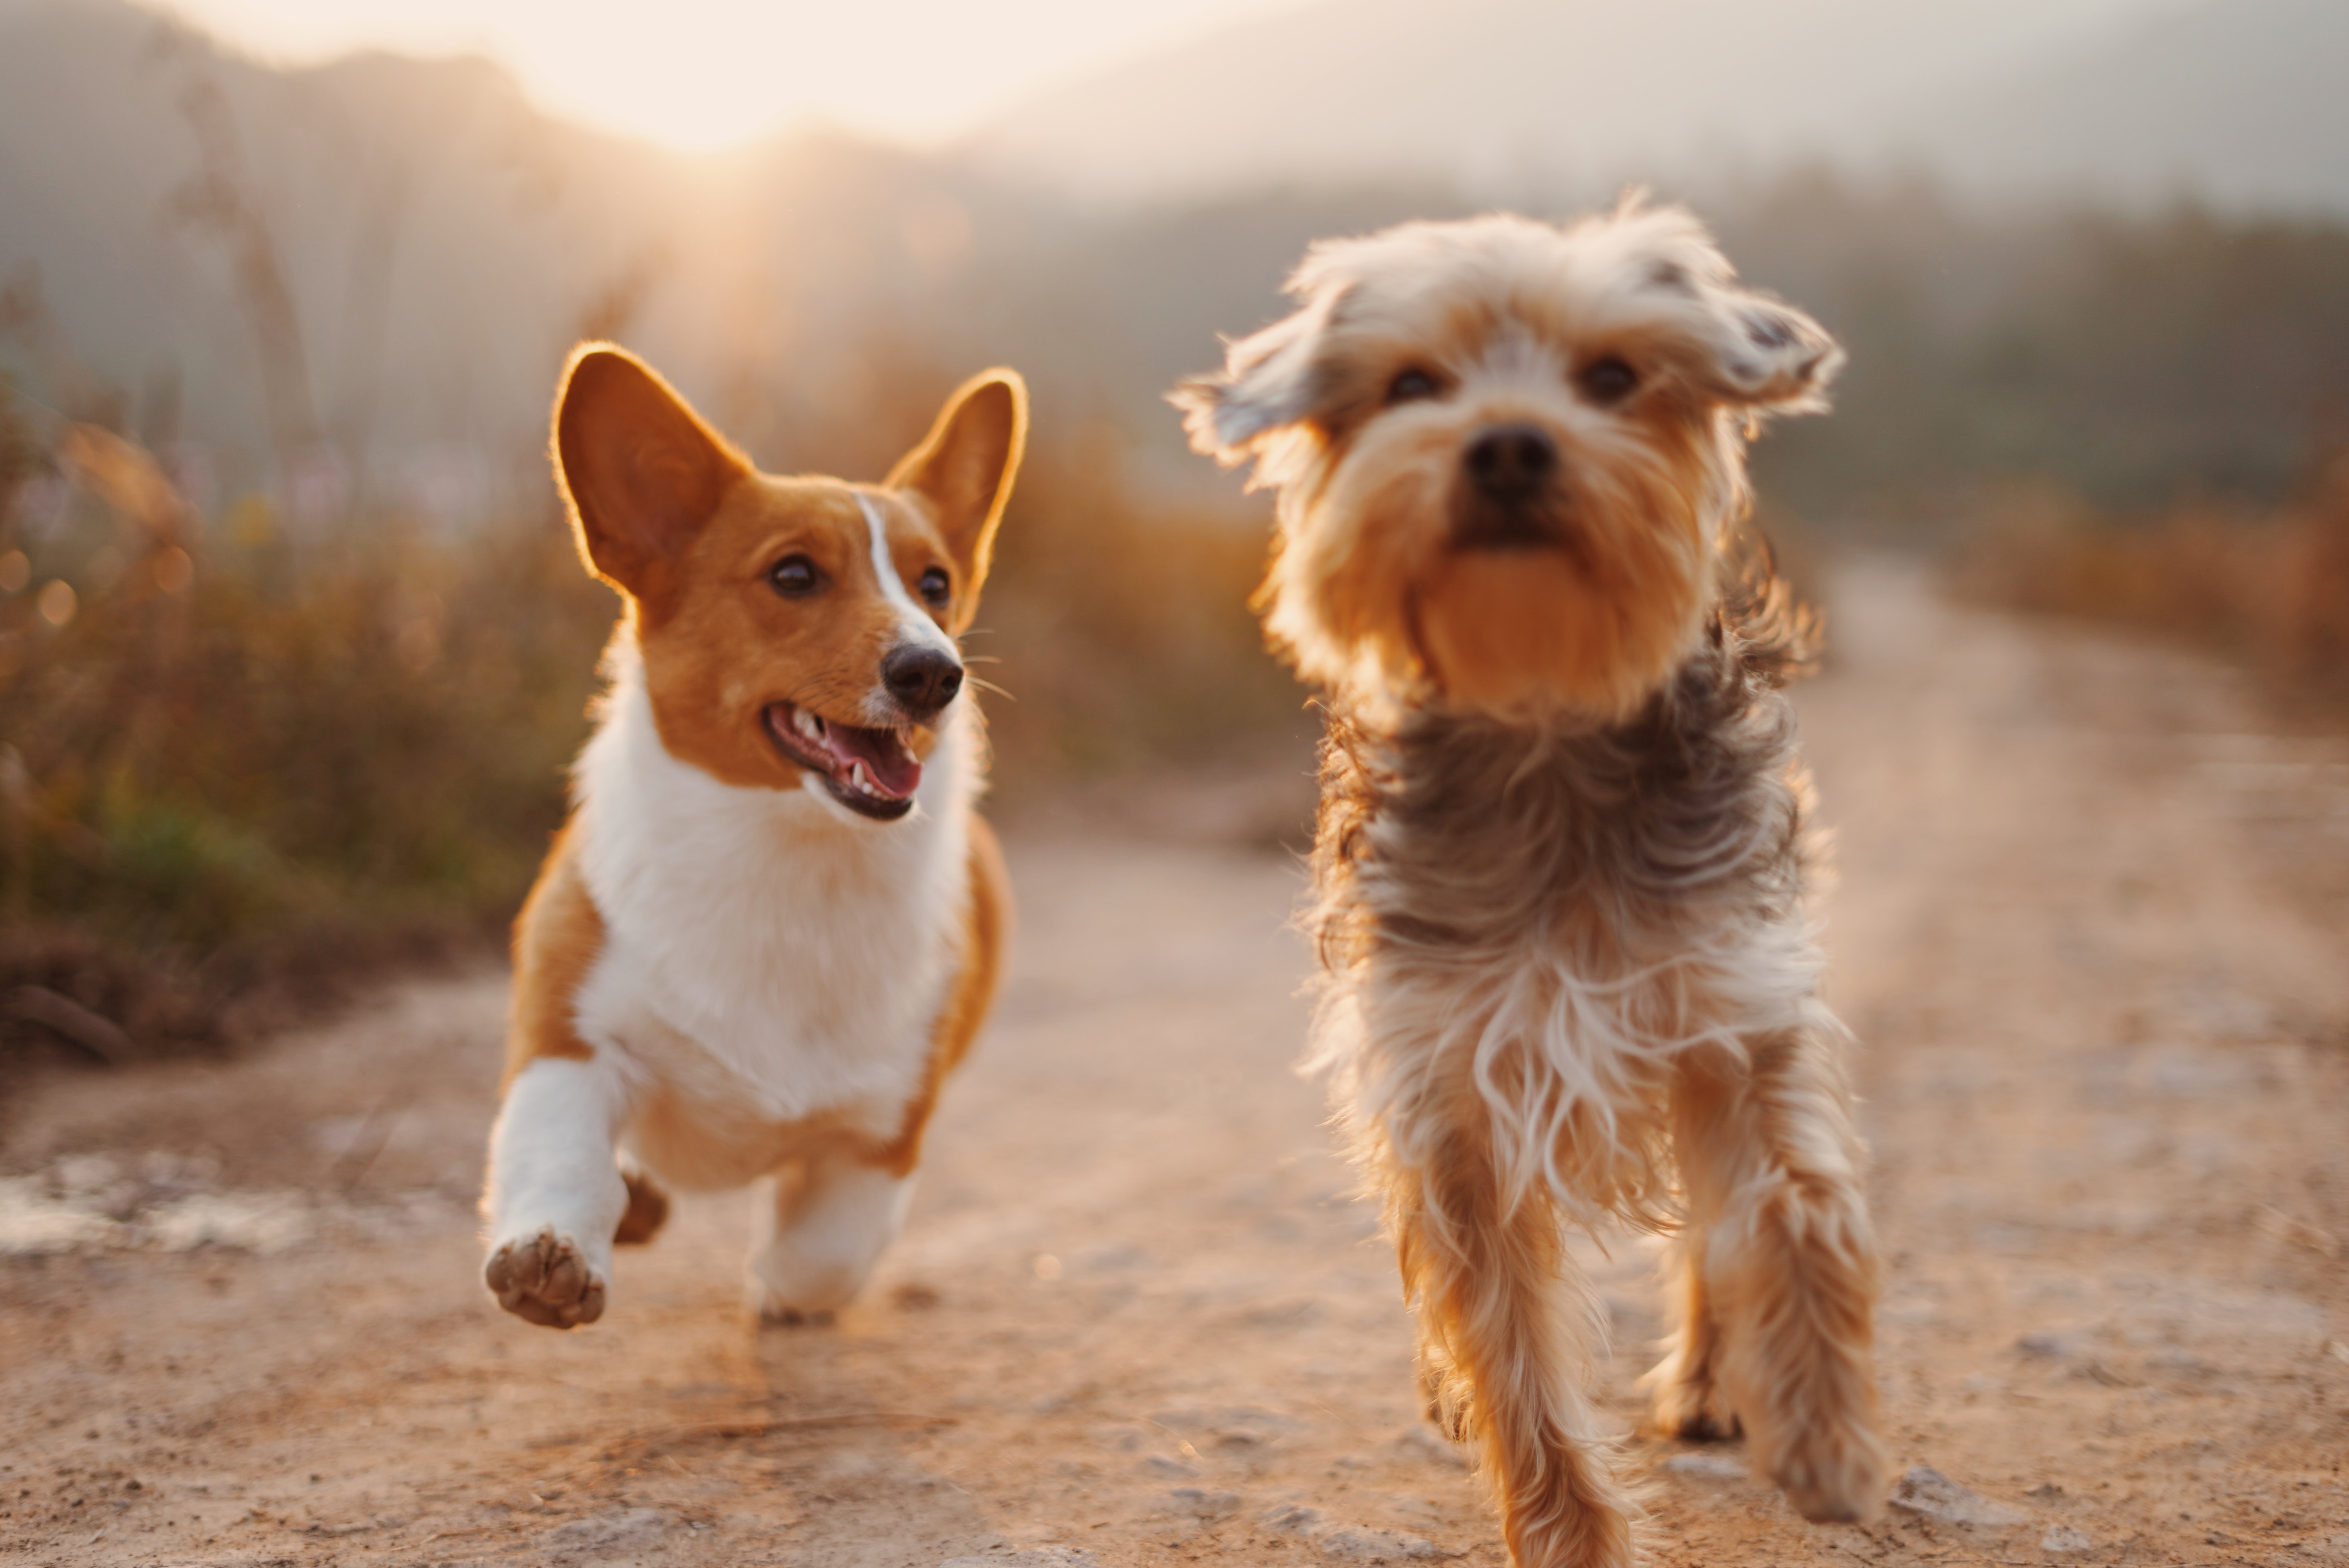
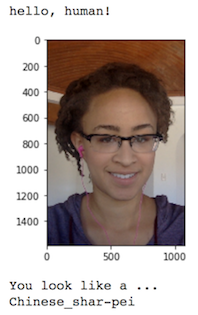
In this project, we’ll make the first steps towards developing an algorithm that could be used as part of a mobile or web app. At the end of this project, our code will accept any user-supplied image as input. If a dog is detected in the image, it will provide an estimate of the dog’s breed. If a human is detected, it will provide an estimate of the dog breed that is most resembling. The image below displays potential sample output of our finished project
In this real-world setting, we will need to piece together a series of models to perform different tasks; for instance, the algorithm that detects humans in an image will be different from the CNN that infers dog breed. There are many points of possible failure, and no perfect algorithm exists.
The Road Ahead
We break the notebook into separate steps. Feel free to use the links below to navigate the notebook.
- Step 0: Import Datasets
- Step 1: Detect Humans
- Step 2: Detect Dogs
- Step 3: Create a CNN to Classify Dog Breeds from Scratch
- Step 4: Create a CNN to Classify Dog Breeds using Transfer Learning
- Step 5: Write our Algorithm
- Step 6: Test our Algorithm
Step 0: Import Datasets
Downloading the required human and dog datasets:
-
a. Download the dog dataset. Unzip the folder and place it in this project’s home directory, at the location
/dog_images. -
b. Download the human dataset. Unzip the folder and place it in the home directory, at location
/lfw.
In the code cell below, we save the file paths for both the human (LFW) dataset and dog dataset in the numpy arrays human_files and dog_files.
import numpy as np
from glob import glob

# load filenames for human and dog images
human_files = np.array(glob("/data/lfw/*/*"))
dog_files = np.array(glob("/data/dog_images/*/*/*"))
>
# print number of images in each dataset
print('There are %d total human images.' % len(human_files))
print('There are %d total dog images.' % len(dog_files))
Output:
    There are 13233 total human images.
    There are 8351 total dog images.
Step 1: Detect Humans
In this section, we use OpenCV’s implementation of Haar feature-based cascade classifiers to detect human faces in images.
OpenCV provides many pre-trained face detectors, stored as XML files on github. We have downloaded one of these detectors and stored it in the haarcascades directory. In the next code cell, we demonstrate how to use this detector to find human faces in a sample image.
import cv2
import matplotlib.pyplot as plt
%matplotlib inline

# extract pre-trained face detector
face_cascade = cv2.CascadeClassifier('haarcascades/haarcascade_frontalface_alt.xml')

# load color (BGR) image
img = cv2.imread(human_files[0])
# convert BGR image to grayscale
gray = cv2.cvtColor(img, cv2.COLOR_BGR2GRAY)

# find faces in image
faces = face_cascade.detectMultiScale(gray)

# print number of faces detected in the image
print('Number of faces detected:', len(faces))

# get bounding box for each detected face
for (x,y,w,h) in faces:
   # add bounding box to color image
   cv2.rectangle(img,(x,y),(x+w,y+h),(255,0,0),2)

# convert BGR image to RGB for plotting
cv_rgb = cv2.cvtColor(img, cv2.COLOR_BGR2RGB)

# display the image, along with bounding box
plt.imshow(cv_rgb)
plt.show()
Output:
    Number of faces detected: 1
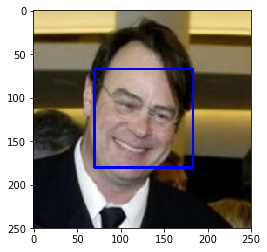
Before using any of the face detectors, it is standard procedure to convert the images to grayscale. The detectMultiScale function executes the classifier stored in face_cascade and takes the grayscale image as a parameter.
In the above code, faces is a numpy array of detected faces, where each row corresponds to a detected face. Each detected face is a 1D array with four entries that specifies the bounding box of the detected face. The first two entries in the array (extracted in the above code as x and y) specify the horizontal and vertical positions of the top left corner of the bounding box. The last two entries in the array (extracted here as w and h) specify the width and height of the box.
Write a Human Face Detector
We can use this procedure to write a function that returns True if a human face is detected in an image and False otherwise. This function, aptly named face_detector, takes a string-valued file path to an image as input and appears in the code block below.
# returns "True" if face is detected in image stored at img_path
def face_detector(img_path):
   img = cv2.imread(img_path)
   gray = cv2.cvtColor(img, cv2.COLOR_BGR2GRAY)
   faces = face_cascade.detectMultiScale(gray)
   return len(faces) > 0
Assess the Human Face Detector
Ideally, we would like 100% of human images with a detected face and 0% of dog images with a detected face. Our algorithm falls short of this goal, but still gives acceptable performance. We are going to use the face detector from OpenCV as a potential way to detect human images in our algorithm. We extract the file paths for the first 100 images from each of the datasets and store them in the numpy arrays human_files_short and dog_files_short.
from tqdm import tqdm

human_files_short = human_files[:100]
dog_files_short = dog_files[:100]

## Test the performance of the face_detector algorithm
## on the images in human_files_short and dog_files_short.
face_detected_in_human_files = 0
face_detected_in_dog_files = 0

for images in human_files_short:
   if face_detector(images):
       face_detected_in_human_files += 1

for images in dog_files_short:
   if face_detector(images):
       face_detected_in_dog_files += 1

print(f"Percentage of Human Faces detected in human_files : {face_detected_in_human_files}%")
print(f"Percentage of Human Faces detected in dog_files : {face_detected_in_dog_files}%")
Output:
    Percentage of Human Faces detected in human_files : 98%
    Percentage of Human Faces detected in dog_files : 17%
Step 2: Detect Dogs
In this section, we use a pre-trained model to detect dogs in images.
Obtain Pre-trained VGG-16 Model
The code cell below downloads the VGG-16 model, along with weights that have been trained on ImageNet, a very large, very popular dataset used for image classification and other vision tasks. ImageNet contains over 10 million URLs, each linking to an image containing an object from one of 1000 categories.
import torch
import torchvision.models as models

# define VGG16 model
VGG16 = models.vgg16(pretrained=True)

# check if CUDA is available
use_cuda = torch.cuda.is_available()

# move model to GPU if CUDA is available
if use_cuda:
   VGG16 = VGG16.cuda()
Output:
    Downloading: "https://download.pytorch.org/models/vgg16-397923af.pth" to /root/.torch/models/vgg16-397923af.pth
    100%|██████████| 553433881/553433881 [00:05<00:00, 99176335.73it/s]
Given an image, this pre-trained VGG-16 model returns a prediction (derived from the 1000 possible categories in ImageNet) for the object that is contained in the image.
Making Predictions with a Pre-trained Model
Now, we’ll write a function that accepts a path to an image (such as 'dogImages/train/001.Affenpinscher/Affenpinscher_00001.jpg') as input and returns the index corresponding to the ImageNet class that is predicted by the pre-trained VGG-16 model. The output should always be an integer between 0 and 999, inclusive.
from PIL import Image
import torchvision.transforms as transforms

def VGG16_predict(img_path):
   '''
   Use pre-trained VGG-16 model to obtain index corresponding to
   predicted ImageNet class for image at specified path

   Args:
       img_path: path to an image

   Returns:
       Index corresponding to VGG-16 model's prediction
   '''

   ## Load and pre-process an image from the given img_path
   ## Return the *index* of the predicted class for that image
   image = Image.open(img_path).convert('RGB')

   data_transform = transforms.Compose([transforms.Resize(224),
                                        transforms.CenterCrop(224),
                                        transforms.ToTensor(),
                                        transforms.Normalize([0.485, 0.456, 0.406],
                                                             [0.229, 0.224, 0.225])])

   image = data_transform(image).unsqueeze(0)
   if use_cuda:
       image = image.cuda()
   predict = VGG16(image)
   predicted_class = predict.data.cpu().argmax()


   return int(predicted_class)
Write a Dog Detector
While looking at the dictionary, you will notice that the categories corresponding to dogs appear in an uninterrupted sequence and correspond to dictionary keys 151-268, inclusive, to include all categories from 'Chihuahua' to 'Mexican hairless'. Thus, in order to check to see if an image is predicted to contain a dog by the pre-trained VGG-16 model, we need only check if the pre-trained model predicts an index between 151 and 268 (inclusive).
We use these ideas to complete the dog_detector function below, which returns True if a dog is detected in an image (and False if not).
### returns "True" if a dog is detected in the image stored at img_path
def dog_detector(img_path):

   class_label = VGG16_predict(img_path)

   return ( (class_label >= 151) & (class_label <=  268))
Assess the Dog Detector
### on the images in human_files_short and dog_files_short.
from tqdm import tqdm

# Initiallizing:
dog_images_in_human_files = 0
dog_images_in_dog_files = 0


for i in tqdm(range(len(human_files_short))):
   if dog_detector(human_files_short[i]):
       dog_images_in_human_files += 1

for i in tqdm(range(len(dog_files_short))):
   if dog_detector(dog_files_short[i]):
       dog_images_in_dog_files += 1


print(f'Dog Images in Human dataset: {dog_images_in_human_files}%')
print(f'Dog Images in Dog Dataset: {dog_images_in_dog_files}%')
Output:
    100%|██████████| 100/100 [00:03<00:00, 28.38it/s]
    100%|██████████| 100/100 [00:04<00:00, 25.46it/s]

    Dog Images in Human dataset: 1%
    Dog Images in Dog Dataset: 100%
Step 3: Create a CNN to Classify Dog Breeds from Scratch
Now that we have functions for detecting humans and dogs in images, we need a way to predict breed from images. In this step, we create a CNN that classifies dog breeds. Our aim is to create a CNN from scratch (so, we can’t use transfer learning yet!), and we must attain a test accuracy of at least 10%. In Step 4 of this notebook, we will have the opportunity to use transfer learning to create a CNN that attains greatly improved accuracy.
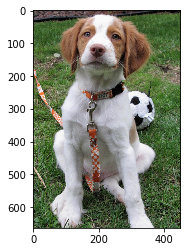
We mention that the task of assigning breed to dogs from images is considered exceptionally challenging. To see why, consider that even a human would have trouble distinguishing between a Brittany and a Welsh Springer Spaniel.
| Brittany | Welsh Springer Spaniel |
|---|---|
 |
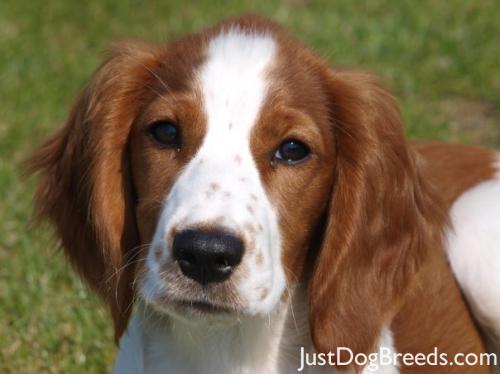 |
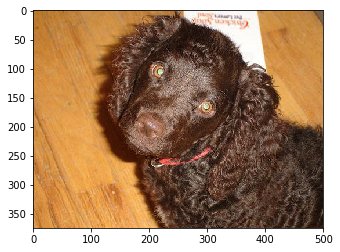
It is not difficult to find other dog breed pairs with minimal inter-class variation (for instance, Curly-Coated Retrievers and American Water Spaniels).
| Curly-Coated Retriever | American Water Spaniel |
|---|---|
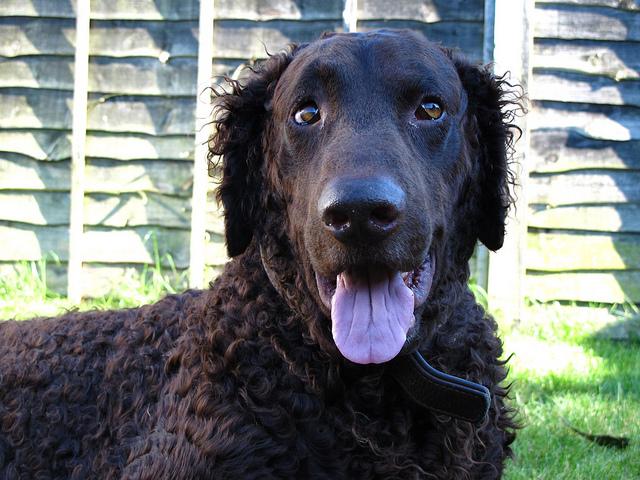 |
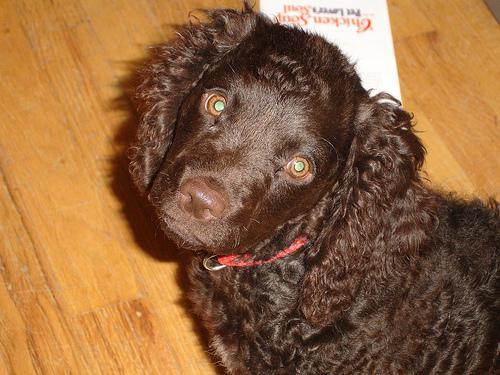 |
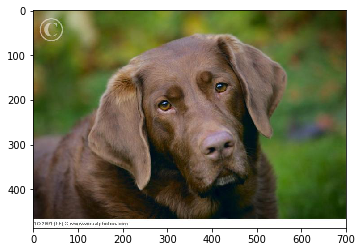
Likewise, recall that labradors come in yellow, chocolate, and black. Your vision-based algorithm will have to conquer this high intra-class variation to determine how to classify all of these different shades as the same breed.
| Yellow Labrador | Chocolate Labrador | Black Labrador |
|---|---|---|
 |
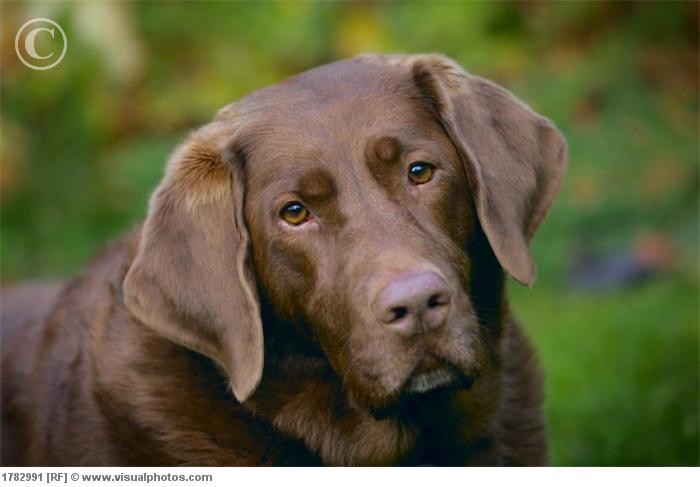 |
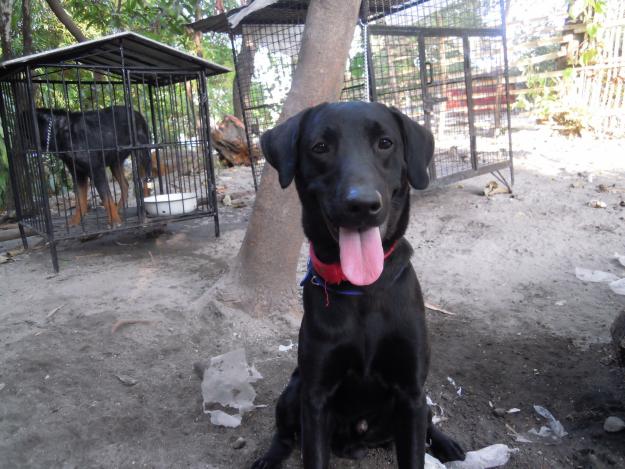 |
We also mention that random chance presents an exceptionally low bar: setting aside the fact that the classes are slightly imabalanced, a random guess will provide a correct answer roughly 1 in 133 times, which corresponds to an accuracy of less than 1%.
Remember that the practice is far ahead of the theory in deep learning. Experiment with many different architectures, and trust your intuition. And, of course, have fun!
Specify Data Loaders for the Dog Dataset
We write three separate data loaders for the training, validation, and test datasets of dog images (located at dog_images/train, dog_images/valid, and dog_images/test, respectively). You may find this documentation on custom datasets to be a useful resource. If you are interested in augmenting your training and/or validation data, check out the wide variety of transforms!
import os
from torchvision import datasets
from PIL import ImageFile
ImageFile.LOAD_TRUNCATED_IMAGES = True

## Specify appropriate transforms, and batch_sizes
num_workers = 0
batch_size = 24

data_dir = '/data/dog_images/'
train_dir = os.path.join(data_dir, 'train/')
test_dir = os.path.join(data_dir, 'test/')
valid_dir = os.path.join(data_dir, 'valid/')


data_transforms = {
                   'train' : transforms.Compose([ transforms.RandomRotation(30),
                                                  transforms.RandomResizedCrop(224),
                                                  transforms.RandomHorizontalFlip(),
                                                  transforms.ToTensor(),
                                                  transforms.Normalize([0.485, 0.456, 0.406],
                                                                       [0.229, 0.224, 0.225])]),

                   'test' : transforms.Compose([ transforms.Resize(255),
                                                 transforms.CenterCrop(224),
                                                 transforms.ToTensor(),
                                                 transforms.Normalize([0.485, 0.456, 0.406],
                                                                      [0.229, 0.224, 0.225])]),
                  'valid' : transforms.Compose([ transforms.Resize(255),
                                                 transforms.CenterCrop(224),
                                                 transforms.ToTensor(),
                                                 transforms.Normalize([0.485, 0.456, 0.406],
                                                                      [0.229, 0.224, 0.225])])
                 }

dataset = {
           'train_data' : datasets.ImageFolder(train_dir, transform=data_transforms['train']),
           'test_data' : datasets.ImageFolder(test_dir,transform=data_transforms['test']),
           'val_data' : datasets.ImageFolder(valid_dir,transform=data_transforms['valid'])
           }

loaders_scratch  = {
                       'train' : torch.utils.data.DataLoader(dataset['train_data'], batch_size=batch_size,
                                                              num_workers=num_workers, shuffle=True),
                       'test' : torch.utils.data.DataLoader(dataset['test_data'], batch_size=batch_size,
                                                             num_workers=num_workers, shuffle=True),
                       'valid' : torch.utils.data.DataLoader(dataset['val_data'], batch_size=batch_size,
                                                             num_workers=num_workers, shuffle=True)
                   }
Model Architecture
Create a CNN to classify dog breed.
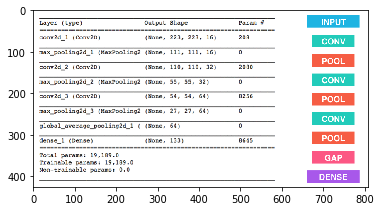
import torch.nn as nn
import torch.nn.functional as F

# define the CNN architecture
class Net(nn.Module):
  ### choose an architecture, and complete the class
   def __init__(self):
       super(Net, self).__init__()
       ## Define layers of a CNN
       # convolutional layer (sees 32x32x3 image tensor)
       self.conv1 = nn.Conv2d(3, 16, 3, padding=1)
       # convolutional layer (sees 16x16x16 tensor)
       self.conv2 = nn.Conv2d(16, 32, 3, padding=1)
       # convolutional layer (sees 8x8x32 tensor)
       self.conv3 = nn.Conv2d(32, 64, 3, padding=1)
       # max pooling layer
       self.pool = nn.MaxPool2d(2, 2)
       # linear layer (64 * 4 * 4 -> 500)
       self.fc1 = nn.Linear(64 * 28 * 28, 500)
       # linear layer (500 -> 10)
       self.fc2 = nn.Linear(500, 133)
       # dropout layer (p=0.25)
       self.dropout = nn.Dropout(0.25)

   def forward(self, x):
       ## Define forward behavior
       # Convolution Layers

       x = self.pool(F.relu(self.conv1(x)))
       x = self.pool(F.relu(self.conv2(x)))
       x = self.pool(F.relu(self.conv3(x)))
       # flatten image input
       x = x.view(-1, 64 * 28 * 28)
       # add dropout layer
       x = self.dropout(x)
       # add 1st hidden layer, with relu activation function
       x = F.relu(self.fc1(x))
       # add dropout layer
       x = self.dropout(x)
       # add 2nd hidden layer, with relu activation function
       x = self.fc2(x)

       return x

#-#-# You so NOT have to modify the code below this line. #-#-#

# instantiate the CNN
model_scratch = Net()

# move tensors to GPU if CUDA is available
if use_cuda:
   model_scratch.cuda()
Specify Loss Function and Optimizer
We specify a loss function and optimizer. Save the chosen loss function as criterion_scratch, and the optimizer as optimizer_scratch below.
import torch.optim as optim

### select loss function
criterion_scratch = nn.CrossEntropyLoss()

### select optimizer
optimizer_scratch = optim.SGD(model_scratch.parameters(), lr=0.03)
Train and Validate the Model
Train and validate your model in the code cell below. Save the final model parameters at filepath 'model_scratch.pt'.
def train(n_epochs, loaders, model, optimizer, criterion, use_cuda, save_path):
   """returns trained model"""
   # initialize tracker for minimum validation loss
   valid_loss_min = np.Inf

   for epoch in range(1, n_epochs+1):
       # initialize variables to monitor training and validation loss
       train_loss = 0.0
       valid_loss = 0.0

       ###################
       # train the model #
       ###################
       model.train()
       for batch_idx, (data, target) in enumerate(loaders['train']):
           # move to GPU
           if use_cuda:
               data, target = data.cuda(), target.cuda()
           ## find the loss and update the model parameters accordingly
           ## record the average training loss, using something like
           ## train_loss = train_loss + ((1 / (batch_idx + 1)) * (loss.data - train_loss))
           optimizer.zero_grad()
           # forward pass: compute predicted outputs by passing inputs to the model
           output = model(data)
           # calculate the batch loss
           loss = criterion(output, target)
           # backward pass: compute gradient of the loss with respect to model parameters
           loss.backward()
           # perform a single optimization step (parameter update)
           optimizer.step()
           # update training loss
           train_loss += loss.item()*data.size(0)


       ######################
       # validate the model #
       ######################
       model.eval()
       for batch_idx, (data, target) in enumerate(loaders['valid']):
           # move to GPU
           if use_cuda:
               data, target = data.cuda(), target.cuda()
           ## update the average validation loss
           output = model(data)
           loss = criterion(output, target)
           # update average validation loss
           valid_loss += loss.item()*data.size(0)

       # calculate average losses
       train_loss = train_loss/len(loaders['train'].dataset)
       valid_loss = valid_loss/len(loaders['valid'].dataset)

       # print training/validation statistics
       print('Epoch: {} \tTraining Loss: {:.6f} \tValidation Loss: {:.6f}'.format(
           epoch,
           train_loss,
           valid_loss
           ))

       ## save the model if validation loss has decreased
       if valid_loss <= valid_loss_min:
           print('Validation loss decreased ({:.6f} --> {:.6f}).  Saving model ...'.format(
           valid_loss_min,
           valid_loss))
           torch.save(model.state_dict(), save_path)
           valid_loss_min = valid_loss
   # return trained model
   return model

# train the model
model_scratch = train(25, loaders_scratch, model_scratch, optimizer_scratch,
                     criterion_scratch, use_cuda, 'model_scratch.pt')

# load the model that got the best validation accuracy
model_scratch.load_state_dict(torch.load('model_scratch.pt'))
Output:
    Epoch: 1 	Training Loss: 4.876332 	Validation Loss: 4.816575
    Validation loss decreased (inf --> 4.816575).  Saving model ...
    Epoch: 2 	Training Loss: 4.748259 	Validation Loss: 4.572024
    Validation loss decreased (4.816575 --> 4.572024).  Saving model ...
    Epoch: 3 	Training Loss: 4.627809 	Validation Loss: 4.499690
    Validation loss decreased (4.572024 --> 4.499690).  Saving model ...
    ...
    Epoch: 25 	Training Loss: 3.850253 	Validation Loss: 3.939559
Test the Model
def test(loaders, model, criterion, use_cuda):

   # monitor test loss and accuracy
   test_loss = 0.
   correct = 0.
   total = 0.

   model.eval()
   for batch_idx, (data, target) in enumerate(loaders['test']):
       # move to GPU
       if use_cuda:
           data, target = data.cuda(), target.cuda()
       # forward pass: compute predicted outputs by passing inputs to the model
       output = model(data)
       # calculate the loss
       loss = criterion(output, target)
       # update average test loss
       test_loss = test_loss + ((1 / (batch_idx + 1)) * (loss.data - test_loss))
       # convert output probabilities to predicted class
       pred = output.data.max(1, keepdim=True)[1]
       # compare predictions to true label
       correct += np.sum(np.squeeze(pred.eq(target.data.view_as(pred))).cpu().numpy())
       total += data.size(0)

   print('Test Loss: {:.6f}\n'.format(test_loss))

   print('\nTest Accuracy: %2d%% (%2d/%2d)' % (
       100. * correct / total, correct, total))

# call test function
test(loaders_scratch, model_scratch, criterion_scratch, use_cuda)
Output:
    Test Loss: 3.923931

    Test Accuracy: 11% (99/836)
Step 4: Create a CNN to Classify Dog Breeds using Transfer Learning
We will now use transfer learning to create a CNN that can identify dog breed from images.
Specify Data Loaders for the Dog Dataset
We create three separate data loaders for the training, validation, and test datasets of dog images (located at dogImages/train, dogImages/valid, and dogImages/test, respectively).
## Specify data loaders
loaders_transfer = loaders_scratch

print(VGG16)
print("Input Features:",VGG16.classifier[6].in_features)
print("Output Features: ",VGG16.classifier[6].out_features)
Output:
    VGG(
      (features): Sequential(
        (0): Conv2d(3, 64, kernel_size=(3, 3), stride=(1, 1), padding=(1, 1))
        (1): ReLU(inplace)
        (2): Conv2d(64, 64, kernel_size=(3, 3), stride=(1, 1), padding=(1, 1))
        (3): ReLU(inplace)
        (4): MaxPool2d(kernel_size=2, stride=2, padding=0, dilation=1, ceil_mode=False)
        (5): Conv2d(64, 128, kernel_size=(3, 3), stride=(1, 1), padding=(1, 1))
        (6): ReLU(inplace)
        (7): Conv2d(128, 128, kernel_size=(3, 3), stride=(1, 1), padding=(1, 1))
        (8): ReLU(inplace)
        (9): MaxPool2d(kernel_size=2, stride=2, padding=0, dilation=1, ceil_mode=False)
        (10): Conv2d(128, 256, kernel_size=(3, 3), stride=(1, 1), padding=(1, 1))
        (11): ReLU(inplace)
        (12): Conv2d(256, 256, kernel_size=(3, 3), stride=(1, 1), padding=(1, 1))
        (13): ReLU(inplace)
        (14): Conv2d(256, 256, kernel_size=(3, 3), stride=(1, 1), padding=(1, 1))
        (15): ReLU(inplace)
        (16): MaxPool2d(kernel_size=2, stride=2, padding=0, dilation=1, ceil_mode=False)
        (17): Conv2d(256, 512, kernel_size=(3, 3), stride=(1, 1), padding=(1, 1))
        (18): ReLU(inplace)
        (19): Conv2d(512, 512, kernel_size=(3, 3), stride=(1, 1), padding=(1, 1))
        (20): ReLU(inplace)
        (21): Conv2d(512, 512, kernel_size=(3, 3), stride=(1, 1), padding=(1, 1))
        (22): ReLU(inplace)
        (23): MaxPool2d(kernel_size=2, stride=2, padding=0, dilation=1, ceil_mode=False)
        (24): Conv2d(512, 512, kernel_size=(3, 3), stride=(1, 1), padding=(1, 1))
        (25): ReLU(inplace)
        (26): Conv2d(512, 512, kernel_size=(3, 3), stride=(1, 1), padding=(1, 1))
        (27): ReLU(inplace)
        (28): Conv2d(512, 512, kernel_size=(3, 3), stride=(1, 1), padding=(1, 1))
        (29): ReLU(inplace)
        (30): MaxPool2d(kernel_size=2, stride=2, padding=0, dilation=1, ceil_mode=False)
      )
      (classifier): Sequential(
        (0): Linear(in_features=25088, out_features=4096, bias=True)
        (1): ReLU(inplace)
        (2): Dropout(p=0.5)
        (3): Linear(in_features=4096, out_features=4096, bias=True)
        (4): ReLU(inplace)
        (5): Dropout(p=0.5)
        (6): Linear(in_features=4096, out_features=1000, bias=True)
      )
    )

    Input Features: 4096
    Output Features: 1000
Model Architecture
Using transfer learning, we create a CNN to classify dog breed.
import torchvision.models as models
import torch.nn as nn

## Specify model architecture
model_transfer = models.vgg16(pretrained=True)

# Freeze training for all "features" layers
for param in model_transfer.features.parameters():
   param.requires_grad = False

n_inputs = model_transfer.classifier[6].in_features

last_layer = nn.Linear(n_inputs, 133)

model_transfer.classifier[6] = last_layer


if use_cuda:
   model_transfer = model_transfer.cuda()
Specify Loss Function and Optimizer
We specify a loss function and optimizer. Save the chosen loss function as criterion_transfer, and the optimizer as optimizer_transfer below.
criterion_transfer = nn.CrossEntropyLoss()
optimizer_transfer = optim.SGD(model_transfer.classifier.parameters(), lr=0.001)
Train and Validate the Model
Train and validate your model in the code cell below. Save the final model parameters at filepath 'model_transfer.pt'.
n_epochs = 15
# train the model
model_transfer = train(n_epochs, loaders_transfer, model_transfer, optimizer_transfer, criterion_transfer, use_cuda, 'model_transfer.pt')

# load the model that got the best validation accuracy (uncomment the line below)
model_transfer.load_state_dict(torch.load('model_transfer.pt'))
Output:
    Epoch: 1 	Training Loss: 4.395283 	Validation Loss: 3.219059
    Validation loss decreased (inf --> 3.219059).  Saving model ...
    Epoch: 2 	Training Loss: 3.086744 	Validation Loss: 1.650656
    Validation loss decreased (3.219059 --> 1.650656).  Saving model ...
    Epoch: 3 	Training Loss: 2.150576 	Validation Loss: 0.968228
    Validation loss decreased (1.650656 --> 0.968228).  Saving model ...
    Epoch: 4 	Training Loss: 1.715927 	Validation Loss: 0.711452
    Validation loss decreased (0.968228 --> 0.711452).  Saving model ...
    Epoch: 5 	Training Loss: 1.492721 	Validation Loss: 0.612683
    Validation loss decreased (0.711452 --> 0.612683).  Saving model ...
    Epoch: 6 	Training Loss: 1.391120 	Validation Loss: 0.539134
    Validation loss decreased (0.612683 --> 0.539134).  Saving model ...
    Epoch: 7 	Training Loss: 1.288818 	Validation Loss: 0.503064
    Validation loss decreased (0.539134 --> 0.503064).  Saving model ...
    Epoch: 8 	Training Loss: 1.234156 	Validation Loss: 0.470367
    Validation loss decreased (0.503064 --> 0.470367).  Saving model ...
    Epoch: 9 	Training Loss: 1.194840 	Validation Loss: 0.455888
    Validation loss decreased (0.470367 --> 0.455888).  Saving model ...
    Epoch: 10 	Training Loss: 1.144792 	Validation Loss: 0.439842
    Validation loss decreased (0.455888 --> 0.439842).  Saving model ...
    Epoch: 11 	Training Loss: 1.132506 	Validation Loss: 0.430309
    Validation loss decreased (0.439842 --> 0.430309).  Saving model ...
    Epoch: 12 	Training Loss: 1.087484 	Validation Loss: 0.421268
    Validation loss decreased (0.430309 --> 0.421268).  Saving model ...
    Epoch: 13 	Training Loss: 1.072485 	Validation Loss: 0.416770
    Validation loss decreased (0.421268 --> 0.416770).  Saving model ...
    Epoch: 14 	Training Loss: 1.027749 	Validation Loss: 0.408649
    Validation loss decreased (0.416770 --> 0.408649).  Saving model ...
    Epoch: 15 	Training Loss: 1.005084 	Validation Loss: 0.391689
    Validation loss decreased (0.408649 --> 0.391689).  Saving model ...
Test the Model
test(loaders_transfer, model_transfer, criterion_transfer, use_cuda)
Output:
    Test Loss: 0.439616

    Test Accuracy: 86% (725/836)
Predict Dog Breed with the Model
We create a function that takes an image path as input and returns the dog breed (Affenpinscher, Afghan hound, etc) that is predicted by our model.
### Function that takes a path to an image as input
### and returns the dog breed that is predicted by the model.

# list of class names by index, i.e. a name can be accessed like class_names[0]
class>_names = [item[4:].replace("_", " ") for item in dataset['train_data'].classes]

def predict_breed_transfer(img_path):
   # load the image and return the predicted breed
   image = Image.open(img_path).convert('RGB')

   data_transform = transforms.Compose([transforms.Resize(224),
                                        transforms.CenterCrop(224),
                                        transforms.ToTensor(),
                                        transforms.Normalize([0.485, 0.456, 0.406],
                                                             [0.229, 0.224, 0.225])])

   image = data_transform(image).unsqueeze(0)
   if use_cuda:
       image = image.cuda()
   predict = model_transfer(image)
   predict = predict.data.cpu().argmax()

   return class_names[predict]
Step 5: Write your Algorithm
We create an algorithm that accepts a file path to an image and first determines whether the image contains a human, dog, or neither. Then,
- a. if a dog is detected in the image, return the predicted breed.
- b. if a human is detected in the image, return the resembling dog breed.
- c. if neither is detected in the image, provide output that indicates an error.
Some sample output for our algorithm is provided below, but feel free to design your own user experience!
Write your Algorithm
### Write your algorithm.
### Feel free to use as many code cells as needed.

def display_image(img_path):
   img = Image.open(img_path)
   plt.imshow(img)
   plt.show()

def run_app(img_path):


   # load and transform image
   image = Image.open(img_path).convert('RGB')

   data_transform = transforms.Compose([transforms.Resize(224),
                                        transforms.CenterCrop(224),
                                        transforms.ToTensor(),
                                        transforms.Normalize([0.485, 0.456, 0.406],
                                                             [0.229, 0.224, 0.225])])

   image = data_transform(image).unsqueeze(0)

   ## handle cases for a human face, dog, and neither
   breed_pred = predict_breed_transfer(img_path)
   if dog_detector(img_path):
       print ('\n\n\n  Dog Detected')
       display_image(img_path)
       return print ('The Predicted Breed:', breed_pred)


   elif face_detector(img_path):
       print ('\n\n\n Human Detected')
       display_image(img_path)
       return print ('Closest Dog Breed:', breed_pred)

   else:
       display_image(img_path)
       print ('\n\n\n Error: Neither Dog nor Human Detected')
Step 6: Test our Algorithm
In this section, we’ll take our new algorithm for a spin!
Test our Algorithm on Sample Images!
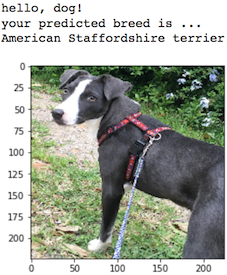
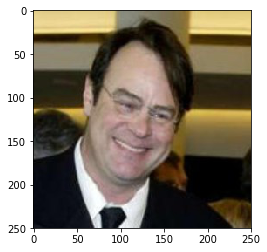
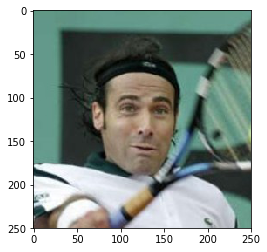
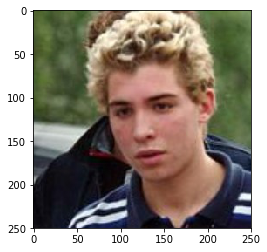
Testing our algorithm with at least six images on our computer. Feel free to use any images you like. Use at least two human and two dog images.
## Execute your algorithm from Step 6 on
## at least 6 images on your computer.
## Feel free to use as many code cells as needed.

## suggested code, below
for file in np.hstack((human_files[:3], dog_files[:3])):
   run_app(file)
Output:
Human Detected
Closest Dog Breed: American staffordshire terrier

 Human Detected
Closest Dog Breed: Dachshund


 Human Detected
Closest Dog Breed: Cocker spaniel


  Dog Detected
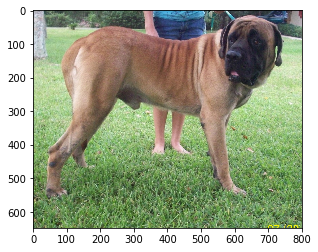
The Predicted Breed: Bullmastiff


  Dog Detected
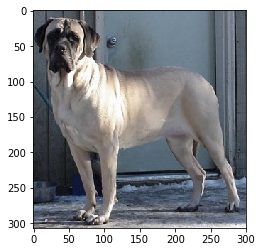
The Predicted Breed: Mastiff


  Dog Detected
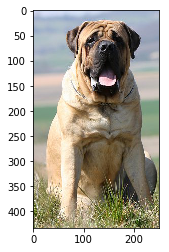
The Predicted Breed: Mastiff
custom_img = glob("./images/*")
for file in np.hstack((custom_img)):
   run_app(file)
Output:
Dog Detected
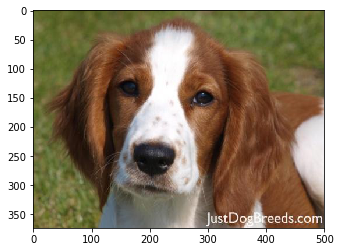
The Predicted Breed: Irish red and white setter
Human Detected
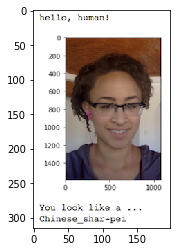
Closest Dog Breed: Cocker spaniel
Dog Detected
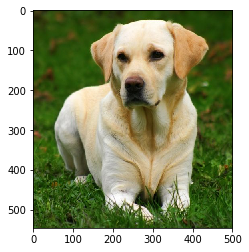
The Predicted Breed: Labrador retriever
Dog Detected
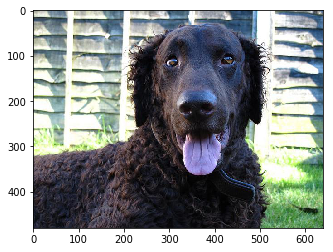
The Predicted Breed: Curly-coated retriever
Error: Neither Dog nor Human Detected
Dog Detected
The Predicted Breed: Brittany


  Dog Detected
The Predicted Breed: Labrador retriever
Dog Detected
The Predicted Breed: American water spaniel
Dog Detected

The Predicted Breed: Greyhound
Dog Detected
The Predicted Breed: Labrador retriever
Conclusion
We’ve successfully developed an algorithm that detects the dog breed for a dog image and estimates the closest resembling dog breed for a human. The model was initially built from scratch using CNNs, upon evaluation we learned that the model was not performing well so we leveraged transfer learning which performed way better than our intial model.
The complete implementation can be found in the GitHub repository.